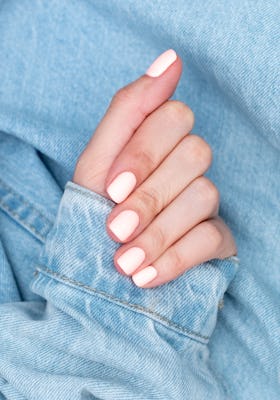
(Nails)
The Easiest Way To Remove Dip Powder Nails — Without Stepping Foot In A Salon
These simple at-home tips will save you a trip to the salon.

Though they'll always be a fan favorite, acrylics are deserving of some major side-eye. While the just-about indestructible overlay may seem to last forever, the damage is more permanent — as it involves heaps of drilling. So as the masses are turning to more modern forms of nail protection like dip powder, the rise of at-home dip powder removal proves to be a less tedious and detrimental process when done correctly.
Read more: Are Powder Dip Nails Harmful? Pros Weigh In
When the coating on your fingers isn't 2 inches thick (like with acrylics), it's easy to assume to that a simple peel-away will do... but that method actually leaves the fingertip even more vulnerable than usual. So ahead, check out the simple at-home tips that will save you a trip to the salon (and, of course, the health of your nails) all at once.
Read more: Why Aprés Gel-X Nails Are Far Better Than Acrylics
What Is Dip Powder For Nails?
When it comes to dip powder, the name is pretty self-explanatory. Lasting for three to four weeks with proper maintenance, the technique involves the finger being dipped into a fine powder made of polymer and resin repeatedly until desired color payoff is met. However, unlike many other long-term nail systems like Après and soft gel, no UV light is required to secure the polish.
The nail is prepped as it is for any other manicure: with adequate filing, cleaning, and disinfecting of the nail beds. Then, the manicurist applies an adhesive base coat made to grip to the powder solution. The nail is dipped into the specific color followed by an activating polish, and the process is repeated two to three times or until the desired look is achieved. Often referred to in salons as SNS, which is the most common brand of dip powder, the trend, which has been around for more than two decades, is seeing rapid growth in popularity with dip powder searches on Pinterest up 442% in 2018.
How To Make At-Home Powder Dip Removal Easier
You'll automatically make dip powder removal less burdensome if only the necessary amount of layers are applied. "Instead of dipping your nail three times in dip color, you may be able to get away with two," says celebrity nail expert Gina Edwards. "Depending on how strong the pigment is for the color, that could very well be all that you need." And when the chipping has begun, marking time for removal, don't act impulsively. "So many people's first thought is pick it off, which ultimately tears away at the nail bed as well as the powder, doing more harm than good," Edwards says. That harm stems from the formula lifting, and unlike gel, the lifting occurs around the most sensitive part of the nail, causing discomfort and a ragged appearance. "It tends to lift around the cuticle," Edwards insists.
The Tricks To A Successful At-Home Removal
"You need an acetone-based remover and an 80 grit file," Edwards says. Begin by filing the powder down — not so much that the nail bed is exposed, but that the topmost layers are worn away. Next, proceed to soak the nails in acetone for 10 to 15 minutes, wiping away the leftover solution. Most importantly, give yourself time. Don't rush the process, and when it's all over, be sure to take care of the nail. "It's important to restore moisture and balance in your nails. Hydrate the cuticle, nail base, and surrounding skin repeatedly until you feel like you're ready for a new set."
So if you've given up on shelling out cash for a professional soak-off and think you can do it yourself, here are some at-home necessities to making it happen.
We only include products that have been independently selected by The Zoe Report's editorial team. However, we may receive a portion of sales if you purchase a product through a link in this article.