(Hair)
Forget The Salon: Braiding Your Hair At Home Has Never Been Easier
Chic looks to DIY.

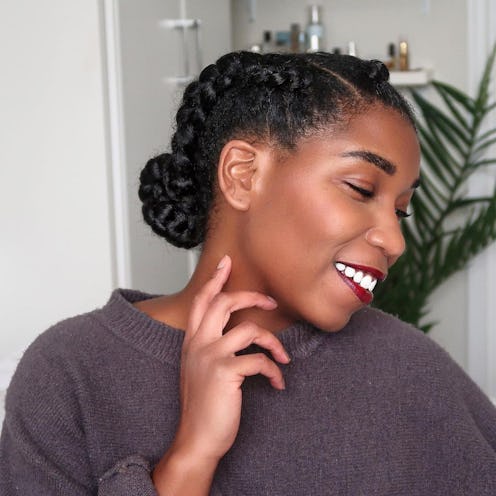
Having your hair professionally braided is an experience that is truly unmatched. But there’s an equally satisfying feeling of creating a style in the comfort of your own home. Thanks to an abundance of video tutorials online, creating trending looks like stitch braids or Marley twists is easier than ever. And while these types of protective hairstyles are effective at guarding against hot tools, there also comes a time when you just need to give your hair a break. This is why mastering how to braid your own hair can be beneficial. For those moments when you’ve taken out your waist-length cornrows, a do-it-yourself (DIY) braided hairstyle will prioritize your natural hair’s health without sacrificing style.
“Braiding your own hair takes time and a lot of patience, especially if you’re new to it,” says celebrity stylist Takisha Sturdivant-Drew. But it doesn't have to be as scary as you may think. With the right tools, products, and technique, you can learn to create a look that will help maintain your hair in between major styles like knotless braids. The other benefit to a DIY braided hairstyle is learning what makes your strands special, from the different curl patterns to the bounce-back of each strand. Ahead, TZR spoke with three stylists for insight on trending styles and how to achieve the looks on your own.
How To Prep Your Hair For Braided Styles
As you probably can guess, the first thing you’ll need to do is thoroughly cleanse your scalp and hair. “For any protective style, you want your hair to be clean and moisturized prior to installation,” says Whitney White, hairstylist, and founder of Melanin Haircare. To do this, she recommends using a clarifying shampoo that will effectively remove buildup and rid the scalp of old products, lint, and dirt. She continues telling TZR that beginning with a clean base is extremely important as your hair will be in the style for a few weeks and washing it will be limited.
Using the right type of conditioner is equally as important. “To replenish the moisture balance and reinforce the strength of the hair for long-term styling, opt for a deep conditioner that has a balance of nourishing and strengthening ingredients like hyaluronic acid, biotin, provitamin B5,” says White.
The washing process ultimately sets the tone for how your style will turn out, so using the right products is crucial. Your goal here is to prep the hair so there will be little tugging or damage during the braiding process. With that in mind, Sturdivant-Drew notes that it’s a good idea to use products that will soften and detangle the hair to make it more manageable.
Braiding Wet Or Dry: Which Is Better?
There are many curly styles that work best when created with wet hair. Braids, however, are not one of them. In fact, hairstylist and owner of Atlanta-based hair salon Salonnvme, Destiny Kelly states that braids, in particular, need to be completed on dry hair. “It’s always best to braid on dry hair to ensure the longevity of your style and to avoid the hair from tangling,” she says. This also helps cut down on fairy knots — tiny knots that tend to form with curly and coily hair — which can be painful to comb out.
The Tools You’ll Need To Braid Your Hair
If you’ve had your hair braided professionally, you’ve probably noticed a few staple tools on your stylist’s station, like a variety of combs and gels, that are necessary for achieving the look. Though you don’t need to have all the items, there are a few essentials you’ll need for doing a salon-quality style at home. “If you’re going to be braiding your hair at home, you should be investing in a good wide tooth comb to thoroughly separate the hair and a rat tail bone comb to part it into sections,” says Sturdivant-Drew. In that vein, she also recommends having some duck clips on hand to hold the sectioned hair to the side as you are braiding.
Selecting Your Braided Style
Choosing your style will really come down to two things: how long you want it to last and how long you want to spend doing it. “There are a few trendy styles such as boho braids and mini twists that can easily be done with just your natural hair,” says Kelly. For these particular styles, you’ll want to use a nourishing twisting butter or moisturizing cream with a nice slip to help smooth the cuticle and hold the braid or twist in place. Similar to their counterpart looks created with extensions these styles can last for up to four weeks with the right maintenance and care.
However if you are looking for something a little more simple and less time-consuming, Sturdivant-Drew notes that two braid styles such as Dutch or French braids are a good option for beginners and require little upkeep. “Cornrows are another option that is easy to DIY and look quite chic when braided straight back in four or six braids,” she says. To achieve this look, she suggests using a styling cream with a paste-like consistency to smooth the hair and give structure to the braids once they’re completed.
Regardless of the look you decide on, all three stylists note that patience will be the ultimate virtue on your braid journey. “Take your time, don’t rush it, and find your preference so that you can master a look to recreate anytime you choose,” says Sturdivant-Drew.
This article was originally published on