(Beauty)
The Nikki Nelms-Approved Way To Use Hot Rollers At Home

My first memory of hot rollers is paired with thoughts of my childhood self sitting under a pink table-top hair dryer in the comfort of my mom's at-home salon. She would set up shop in the middle of the living room on Sundays as we prepared for the work and school week ahead. I remember, at the time, cringing at the thought of the curlers burning my scalp ("Pain is beauty", my mother would say, only half-kidding). But it wasn't until this period of social distancing nearly 15 years later, that I decided I would learn how to use hot rollers in an attempt to maintain my beloved waves during quarantine. In hopes of fine-tuning and perfecting the process, I asked celebrity hairstylist Nikki Nelms to walk me through, step by step. The result? Salon-level curls and waves within minutes.
Known best for her innovative designs and star-studded clientele list (think Zoe Kravitz, Yara Shahidi, and Solange Knowles to name a few), Nikki Nelms links her fondness of hot rollers to her days at Florida State University. "Mary, my roommate in college, had a set of hot rollers", she explains to me over a Zoom call. "I really liked the way she was able to multitask and do multiple things — like her makeup, or get dressed, all while still doing her hair". Attesting to the tool's practicality, Nelms proves that there's no better time than the present to invest in a set for yourself.
Hot rollers may seem redundant, at first — what with all the barreled wands and multi-functional flat irons at your disposal. But now that you’re spending more time at home, having the electric curlers within arms reach will certainly prove to be a good thing. Dating back as far as 1930, hot rollers have been around for decades. However if, like myself you found the pin-hook technology of antiquated styles difficult to use on yourself, many iterations have since been created to ensure the curlers hold comfortably.
Above all else, finding the hot roller set to fit your specific needs is the first place to start. After a bit of comparative research, I decided on Remington’s 20-piece hot roller set, $34.99, from Target. The set of small and medium curlers are updated with a black velvet base for soft strands (though Nelms advises staying away from these in particular if your hair is freshly bleached or blonde to prevent staining) and matching claw clips to keep the rollers comfortably in place. This allows you to multitask without the fear of moving around freely.
“Look at your rollers the same way you would your irons”, Nelms notes. “The relationship between the size and the amount of rollers used is important, as it will determine the type of curl.” If you’re looking for tight ringlets, the hair mogul suggests using plenty of smaller rollers. For those that want more volume and loose waves, you’ll want to grab fewer larger rollers. But according to Nelms, it’s “all about positioning” — meaning the way that you roll your hair will directly impact the outcome. Winding your hair ‘off-base’ (or away from your scalp) results in less volume, while positioning the curler ‘on base’ (towards the scalp) will give you the fullness you’re looking for.
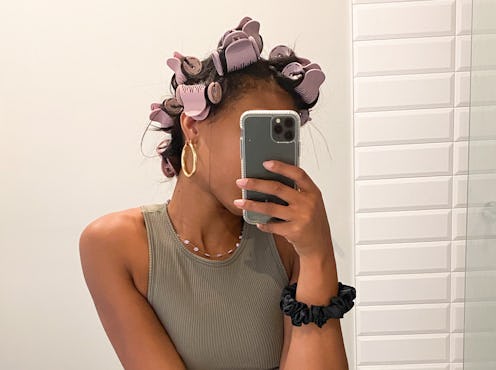
When it came time to try out for myself, I opted for my signature loose (and downright, messy) waves. To achieve my desired outcome, I started by rolling four of the bigger pieces, on base and along the crown of my head for a voluminous base; switching to the medium size for the remaining strands. And finally, I ran my fingers through my hair in a downward motion for a tousled finish.
Regardless of your style preference, just ahead is a step-by-step process to help you achieve effortlessly-chic curls in under 10-minutes. As for Nelms's biggest pro tip: "Trial and error is key — don't be afraid to try out a few different techniques and start all over if you have to." See her how-to ahead.
Step 1: Detangle/Brush Your Hair
“Don’t work against yourself”, Nelms says. “Always start with detangled, dry hair that’s been brushed through for smoothness.”
Step 2: Add Heat Protectant
Much like you would before using a flat iron or barrel curling iron, apply a dime-size drop of your favorite heat protectant before rolling your hair.
Step 3: Divide Hair Into Sections
To make sure that you didn’t miss any pieces, divide your hair into sizable sections that will wrap comfortably around the curlers. Use a rattail comb for to create parts in your hair that are both clean and even.
Step 4: Position Curlers (& Be Consistent)
Once you know what type of curls you’re aiming for, position the rollers in your hair accordingly, starting from top to bottom. If you’re going for a particular type of curl, be sure to keep the size, amount, and positioning of rollers consistent across your entire head. Leave the curlers in your hair for seven to 10 minutes before removing.
Step 5: Finish With Setting Spray
Use a non-hardening setting spray once you’re finished to keep the curls from falling for soft strands that will last for days.
This article was originally published on